
*NOTE: I HAVE AN UPDATED VERSION OF THIS TUTORIAL THAT IS VISUALLY MUCH CLOSER TO THE VSCO PRESETS. CLICK ON OVER TO VIEW IT.*
*NOTE: This is in no way a replica of VSCO. I recommend purchasing VSCO for Lightroom or Camera Raw if you’re able, as they’ve done an amazing job of creating some impressive presets for your photos. This is simply my very affordable way of trying to achieve a similar look using what’s available to me. And I look forward to purchasing VSCO sometime in the near future.*
First off, let me say that this look isn’t for everyone. VSCO is super popular, but that doesn’t mean that everyone should use it. When developing a specific editing style, you need to go with what is most you. Don’t go with what’s the most popular, don’t try to make your final style an exact copy of someone else’s. I’ve been developing my editing style for a year or two, and have spent countless hours playing around with Photoshop and Lightroom, using and tweaking hundreds of presets and actions, and copying other photographers’ styles. But I’ve only done that in order to find what I like. You’ll never know what it is you love until you start experimenting with colors, light, and moods.
What I did to try and find my style was to look at all the photos that attracted me visually, and analyze the common thread they all shared. I found that I was attracted to photos with rich colors, soft and bright skin tones, and the matte look of a film photo. I shoot with a Powershot SX20 IS – a high-end point and shoot – which can sometimes give me photos that are more grainy than I would wish. So adding a controlled film grain to my photos was not only something I liked visually, but was something that translated one of my camera’s flaws into something that is now a part of my style.
So that’s the point. Choose your editing style by analyzing what YOU love, what feels to be most you, what fits with your camera and your resources. Okay, now onto the style!
This is the photo we’ll be using, of my sister Lydia at Starbucks. It’s a bit overexposed, but it will work very well in demonstrating this process.
")
The first step is to duplicate the original image, rename it as “Grain,” and apply the grain. I usually just go to filter/noise/add noise at about 9%, uniform distribution. There are other ways to do this that more accurately imitate film grain, but I like using this method. Next add a bit of a vignette by adding a new layer, filling it with white, going to filters/lens correction, going to the custom tab, and entering –30 in the vignette slider. Change the blending mode of this layer to multiply.
")
Next, brighten your image by adding a curves layer. Part of what will give this photo a matte appearance is decreasing contrast slightly – I decreased it by –10. This also helps even out skin tones. Next is vibrance. This boosts color without messing up the photo. I increased mine to 72.
")
A big thing in some of the VSCO styles is crushed blacks. I added the selective color layer to achieve this, and used the following settings –
Red: Black +20
Yellow: Magenta +70, Yellow +20
Green: Yellow +50, Black +100
Blue: Black +30
White: Yellow -45
Black: +50
You’ll want to experiment with the blacks and the whites. When I’m editing photos of nature I tend to up the blacks and not do much to the white. It’s vice versa for portraits – taking the yellow out of the white actually makes the skin more neutral, while bringing out the blacks can remove all detail in the eyes.
")
Last is to add the matte look. You can do this by adding a new curves layer, and editing the R, G, and B channels separately. You’ll be taking the lowest point of the line (the darkest colors), and raising it up and to the right just a little. You can see what mine look like below. Experiment with this, too. Bringing the red channel’s line up higher will give a red tint to the photo, while raising the blue will give a blue tint.
")
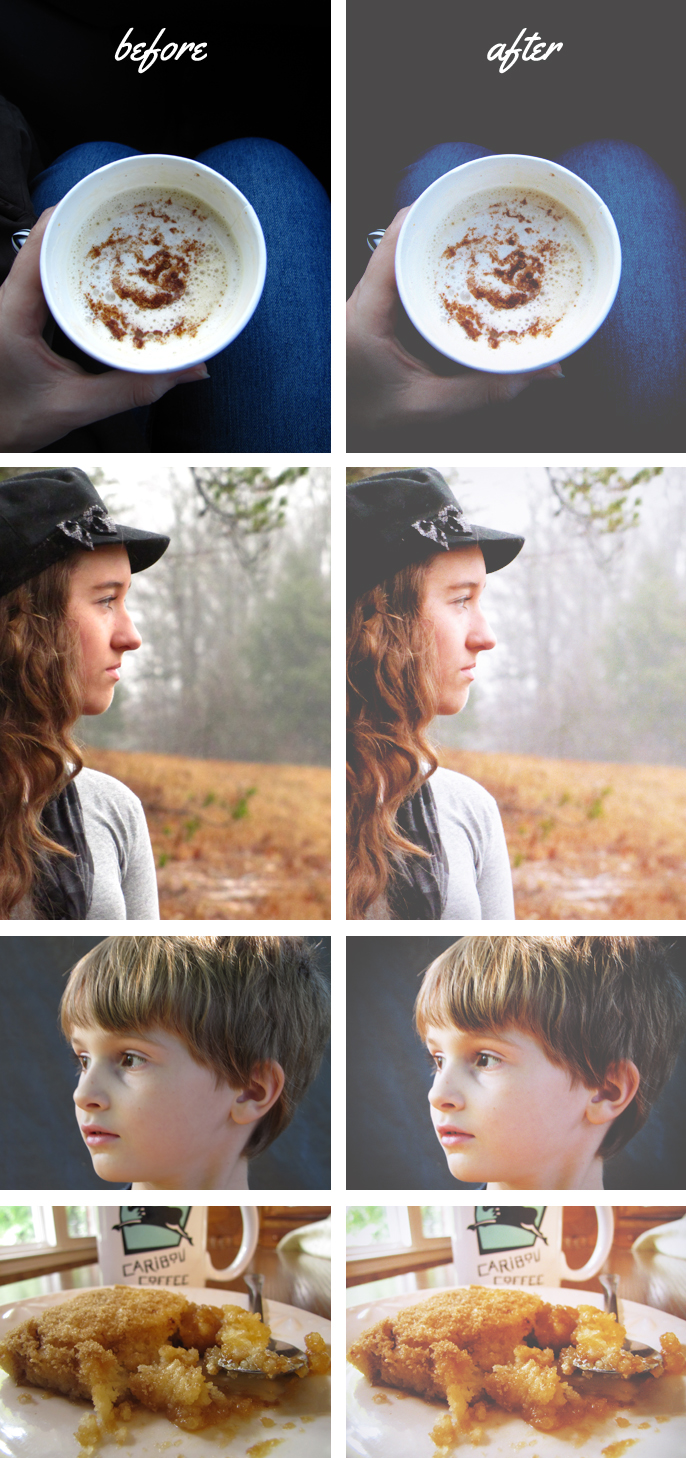
And this is the final photo! I’ve made this VSCO look-alike action available here. Keep in mind that I have fine-tuned it to work with the images I take with my specific camera, so you may need to do some tweaking in order to get the right look for you. And let me know – has this helped you? What do you think of this method, and do you have another one that has worked for you?


Finally found how to get that matte look !
You make my day,thanks.
You must also try film emulations from EyesMeal studio, the best film looks for Photoshop I’ve ever seen!
I’m so glad I could help you! =D
this help me a lot hannah. THANKS! ;D
You’re a gem!! This is awesome, I’ve been going around in circles trying to figure it out. Thank you!
You’re so welcome, Gabriel! Glad it was a help. =) I actually just updated the tutorial after having worked on it for a few months – not sure if it would help, but here’s the link anyway! =) http://blog.hannahrosebeasley.com/2013/01/how-to-get-vsco-look-in-photoshop.html
This is just fabulous. Thanks for such a great tutorial :)
Thank you for the action. The explanation helped so much!
Good explanation. Well done for such a clear tutorial.
The link to your action seems to be messed up?
Can you please do a Youtube tutorial? I don’t really get it :/
i’m having problems with that D:
it isn’t working in my pictures, could you help me pls? i just love this effect <3
You use photoshop cs live?
can u make a psd of this?
Such a nice tut! Thanks so much!
thx..!!! got it ;)
<3 it
Thanks so much for this tutorial, I’m so happy I found your blog… Thak you :)
show, thanks
CEI is an online based clipping path and image masking service provider that provides high quality photoshop clipping path service at affordable rate.
Thank youuuuu so much :DDD
Nice!
Your tutorial is so nice, but check this http://www.film-effect-photoshop.com/
Just downloaded your action. Great stuff!! Thanks so much!
Thank you so much for explanation!
Thanks a lot.. Appreciate it!
hi hannah, i’m having some trouble from this step on:
Next add a bit of a vignette by adding a new layer, filling it with white, going to filters/lens correction, going to the custom tab, and entering –30 in the vignette slider. Change the blending mode of this layer to multiply.
could you explain this to me? thanks
awesome!!m/,
Hi Hannah, Learned a lot from your blog. Thanks to do something in photoshop..
This is incredible! I’ve thought about playing around with the presets for a while now, but quite new to PS. Thank you so much!
this is so incredibly helpful ilysm <3 thankyouu! <3 <3 <3
Thank you SO MUCH. <3
The link doesn’t work :(
Thank you. I tried to emulate this on PSE 12. After trial, error and some searching I am able to recreate this effect. I have been trying to figure this one out for a year and a half. Thank you a million times!
VSCO look in photoshop is really amazing thinking. Here i got a great tutorials with few action free.
Thanks to author for sharing kind of article. best of luck and hope i will see more from you soon for learning more about photoshop .